Trang này liệt kê tất cả các tính năng khác hiện có mà bạn có thể thấy hữu ích.
Global prefix (tiền tố toàn cục)
Để bỏ qua một global prefix cho route đã set qua setGlobalPrefix(), dùng ignoreGlobalPrefix:
const document = SwaggerModule.createDocument(app, options, {
  ignoreGlobalPrefix: true,
});
Global parameters (tham số toàn cục)
Bạn có thể định nghĩa tham số cho tất cả route bằng DocumentBuilder, như sau:
const config = new DocumentBuilder()
  .addGlobalParameters({
    name: 'tenantId',
    in: 'header',
  })
  // các cấu hình khác
  .build();
Global responses (response toàn cục)
Bạn có thể định nghĩa response toàn cục cho tất cả route bằng DocumentBuilder. Điều này hữu ích khi bạn muốn thiết lập các response nhất quán trên toàn bộ endpoint của ứng dụng, chẳng hạn các error code như 401 Unauthorized hoặc 500 Internal Server Error.
const config = new DocumentBuilder()
  .addGlobalResponse({
    status: 500,
    description: 'Internal server error',
  })
  // các cấu hình khác
  .build();
Ghi chú người dịch Nếu bạn từng làm với Express, addGlobalResponse không giống một error-handling middleware (nó không bắt lỗi thực tế) — nó chỉ là khai báo mô tả trong tài liệu OpenAPI, cho Swagger UI hiển thị rằng “endpoint này có thể trả về 500”, còn logic xử lý lỗi thật vẫn phải tự viết (ví dụ qua exception filter). Nhầm hai khái niệm này là một cạm bẫy khá thường gặp.
Multiple specifications (nhiều spec)
SwaggerModule cung cấp cách hỗ trợ nhiều spec. Nói cách khác, bạn có thể phục vụ nhiều tài liệu khác nhau, với UI khác nhau, trên các endpoint khác nhau.
Để hỗ trợ nhiều spec, ứng dụng của bạn phải được viết theo hướng module hóa. Method createDocument() nhận tham số thứ 3, extraOptions, là một object có property tên include. Property include nhận giá trị là một mảng các module.
Bạn có thể thiết lập hỗ trợ nhiều spec như sau:
import { NestFactory } from '@nestjs/core';
import { SwaggerModule, DocumentBuilder } from '@nestjs/swagger';
import { AppModule } from './app.module.js';
import { CatsModule } from './cats/cats.module.js';
import { DogsModule } from './dogs/dogs.module.js';

async function bootstrap() {
  const app = await NestFactory.create(AppModule);

  /**
   * createDocument(application, configurationOptions, extraOptions);
   *
   * createDocument method takes an optional 3rd argument "extraOptions"
   * which is an object with "include" property where you can pass an Array
   * of Modules that you want to include in that Swagger Specification
   * E.g: CatsModule and DogsModule will have two separate Swagger Specifications which
   * will be exposed on two different SwaggerUI with two different endpoints.
   */

  const options = new DocumentBuilder()
    .setTitle('Cats example')
    .setDescription('The cats API description')
    .setVersion('1.0')
    .addTag('cats')
    .build();

  const catDocumentFactory = () =>
    SwaggerModule.createDocument(app, options, {
      include: [CatsModule],
    });
  SwaggerModule.setup('api/cats', app, catDocumentFactory);

  const secondOptions = new DocumentBuilder()
    .setTitle('Dogs example')
    .setDescription('The dogs API description')
    .setVersion('1.0')
    .addTag('dogs')
    .build();

  const dogDocumentFactory = () =>
    SwaggerModule.createDocument(app, secondOptions, {
      include: [DogsModule],
    });
  SwaggerModule.setup('api/dogs', app, dogDocumentFactory);

  await app.listen(process.env.PORT ?? 3000);
}
await bootstrap();
Bây giờ bạn có thể start server bằng lệnh sau:
$ npm run startTruy cập http://localhost:3000/api/cats để xem Swagger UI cho cats:
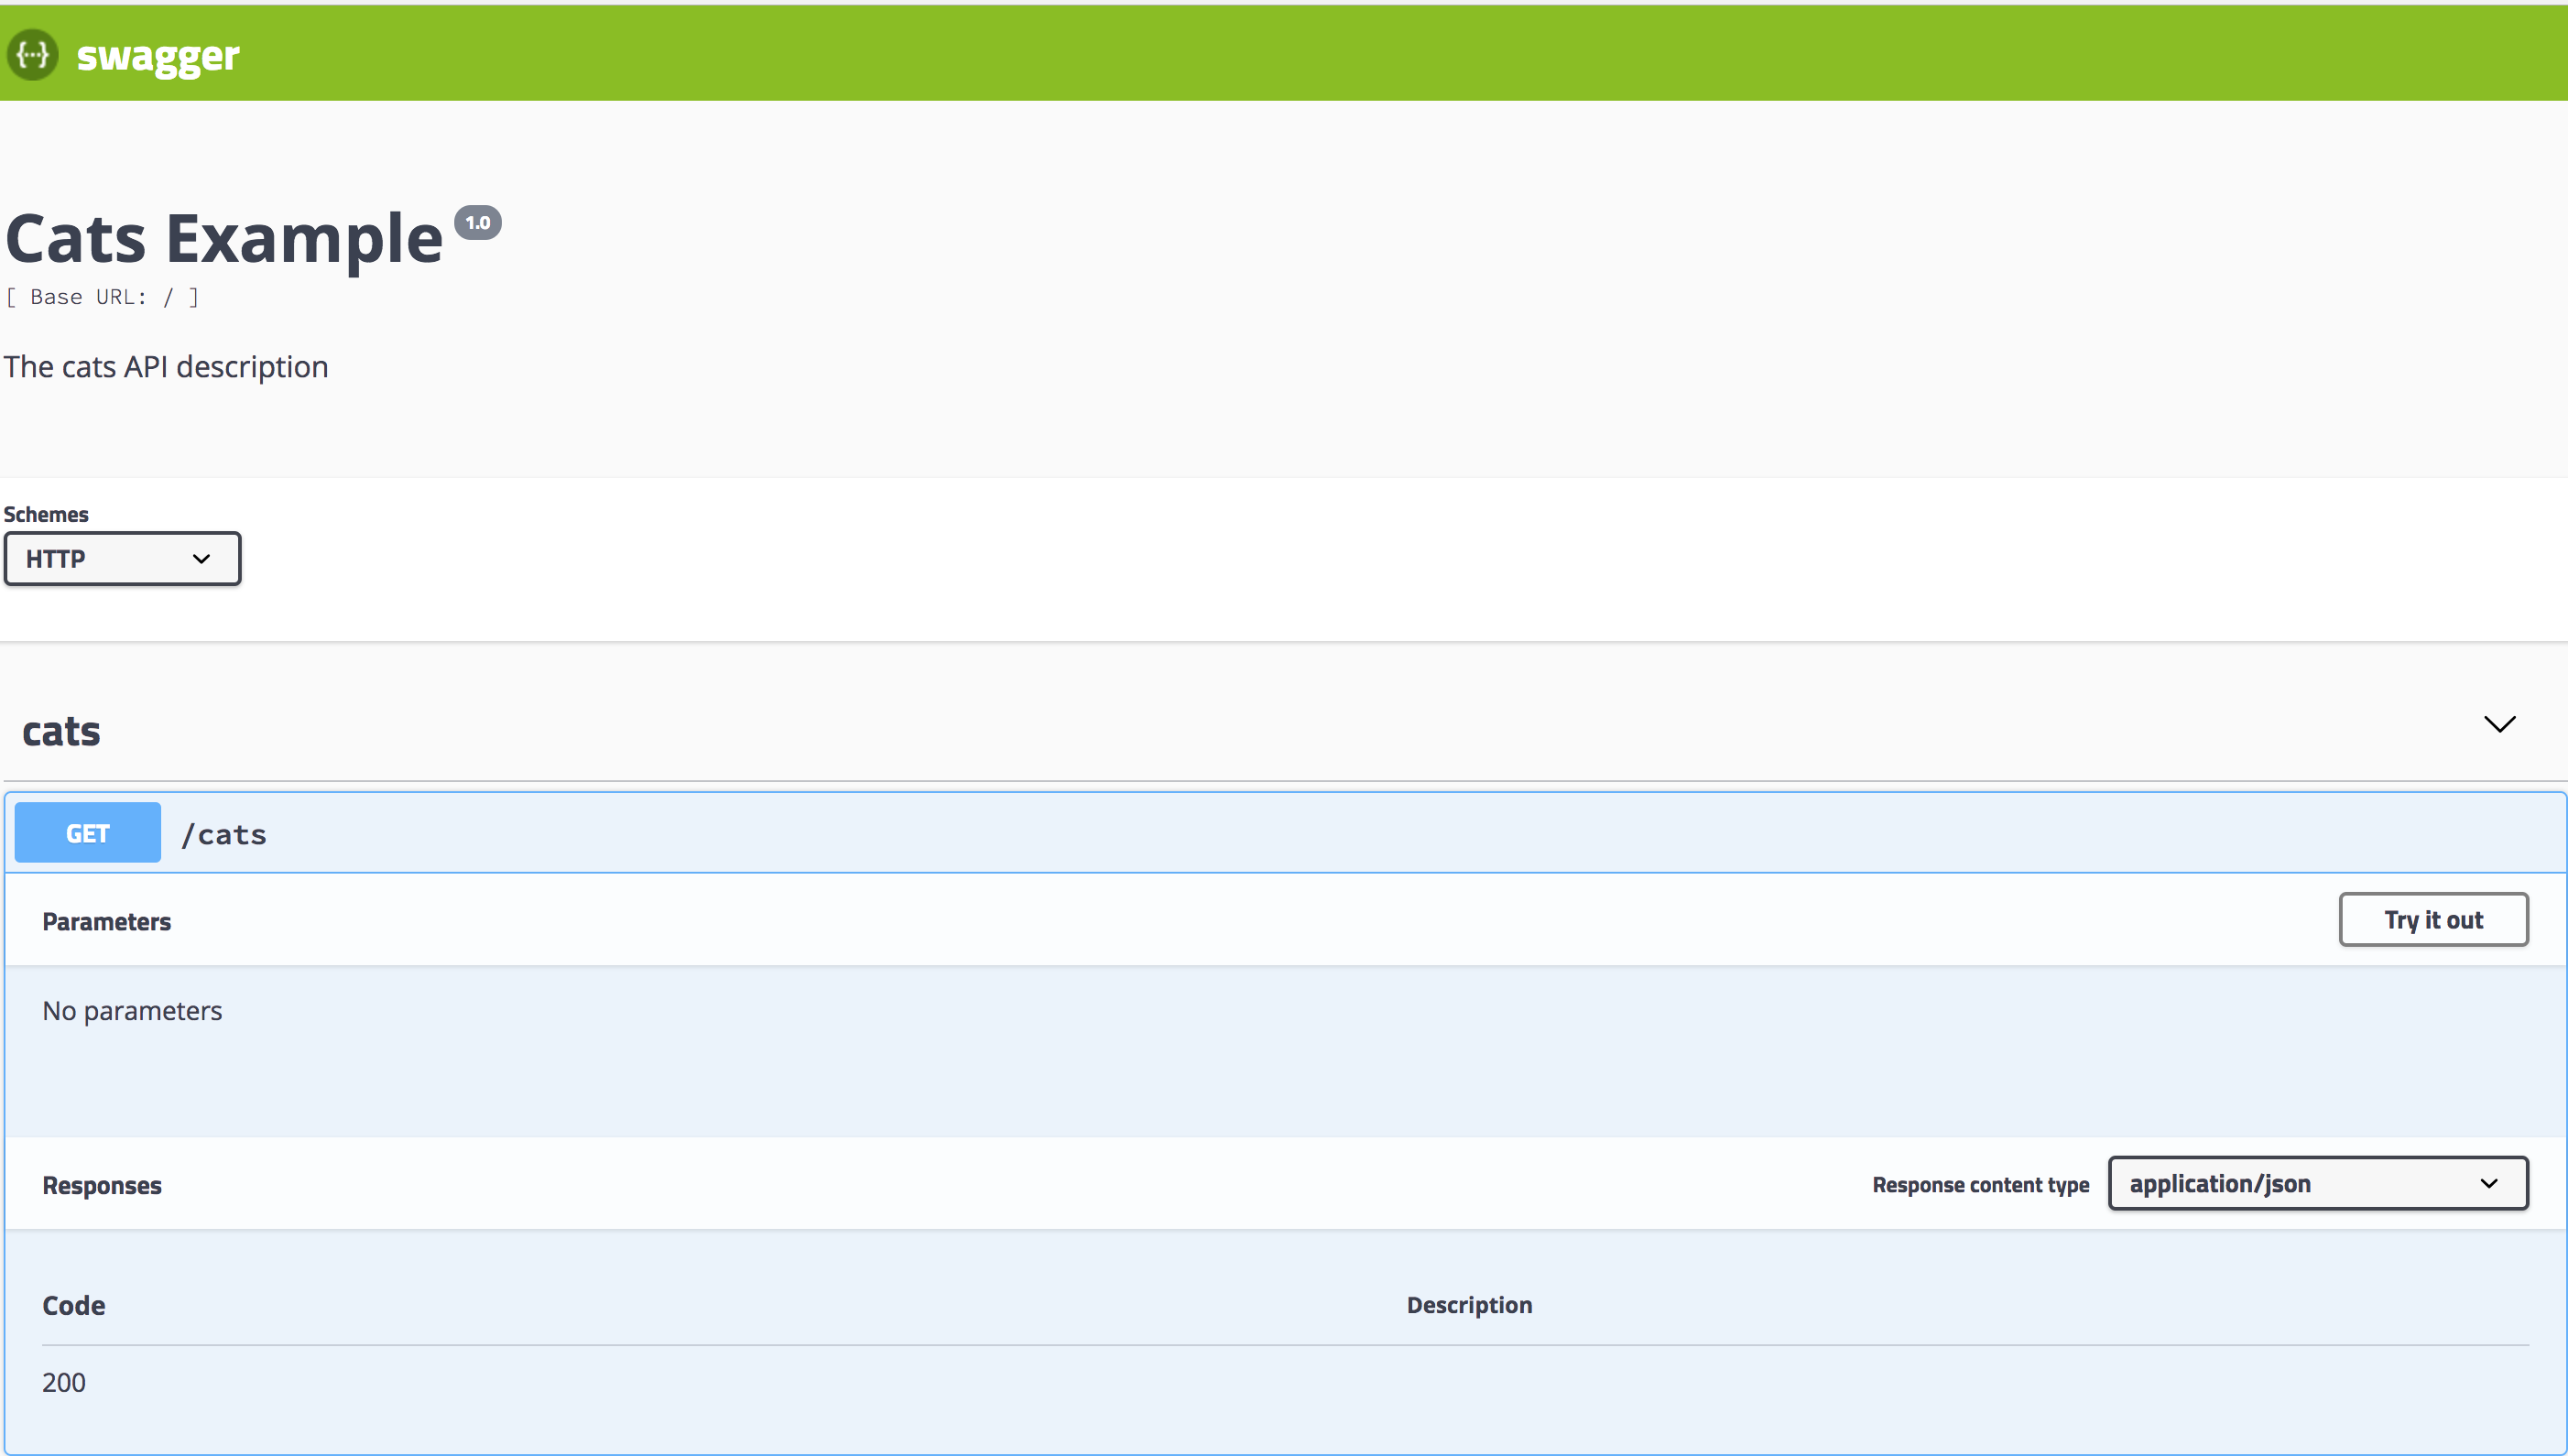
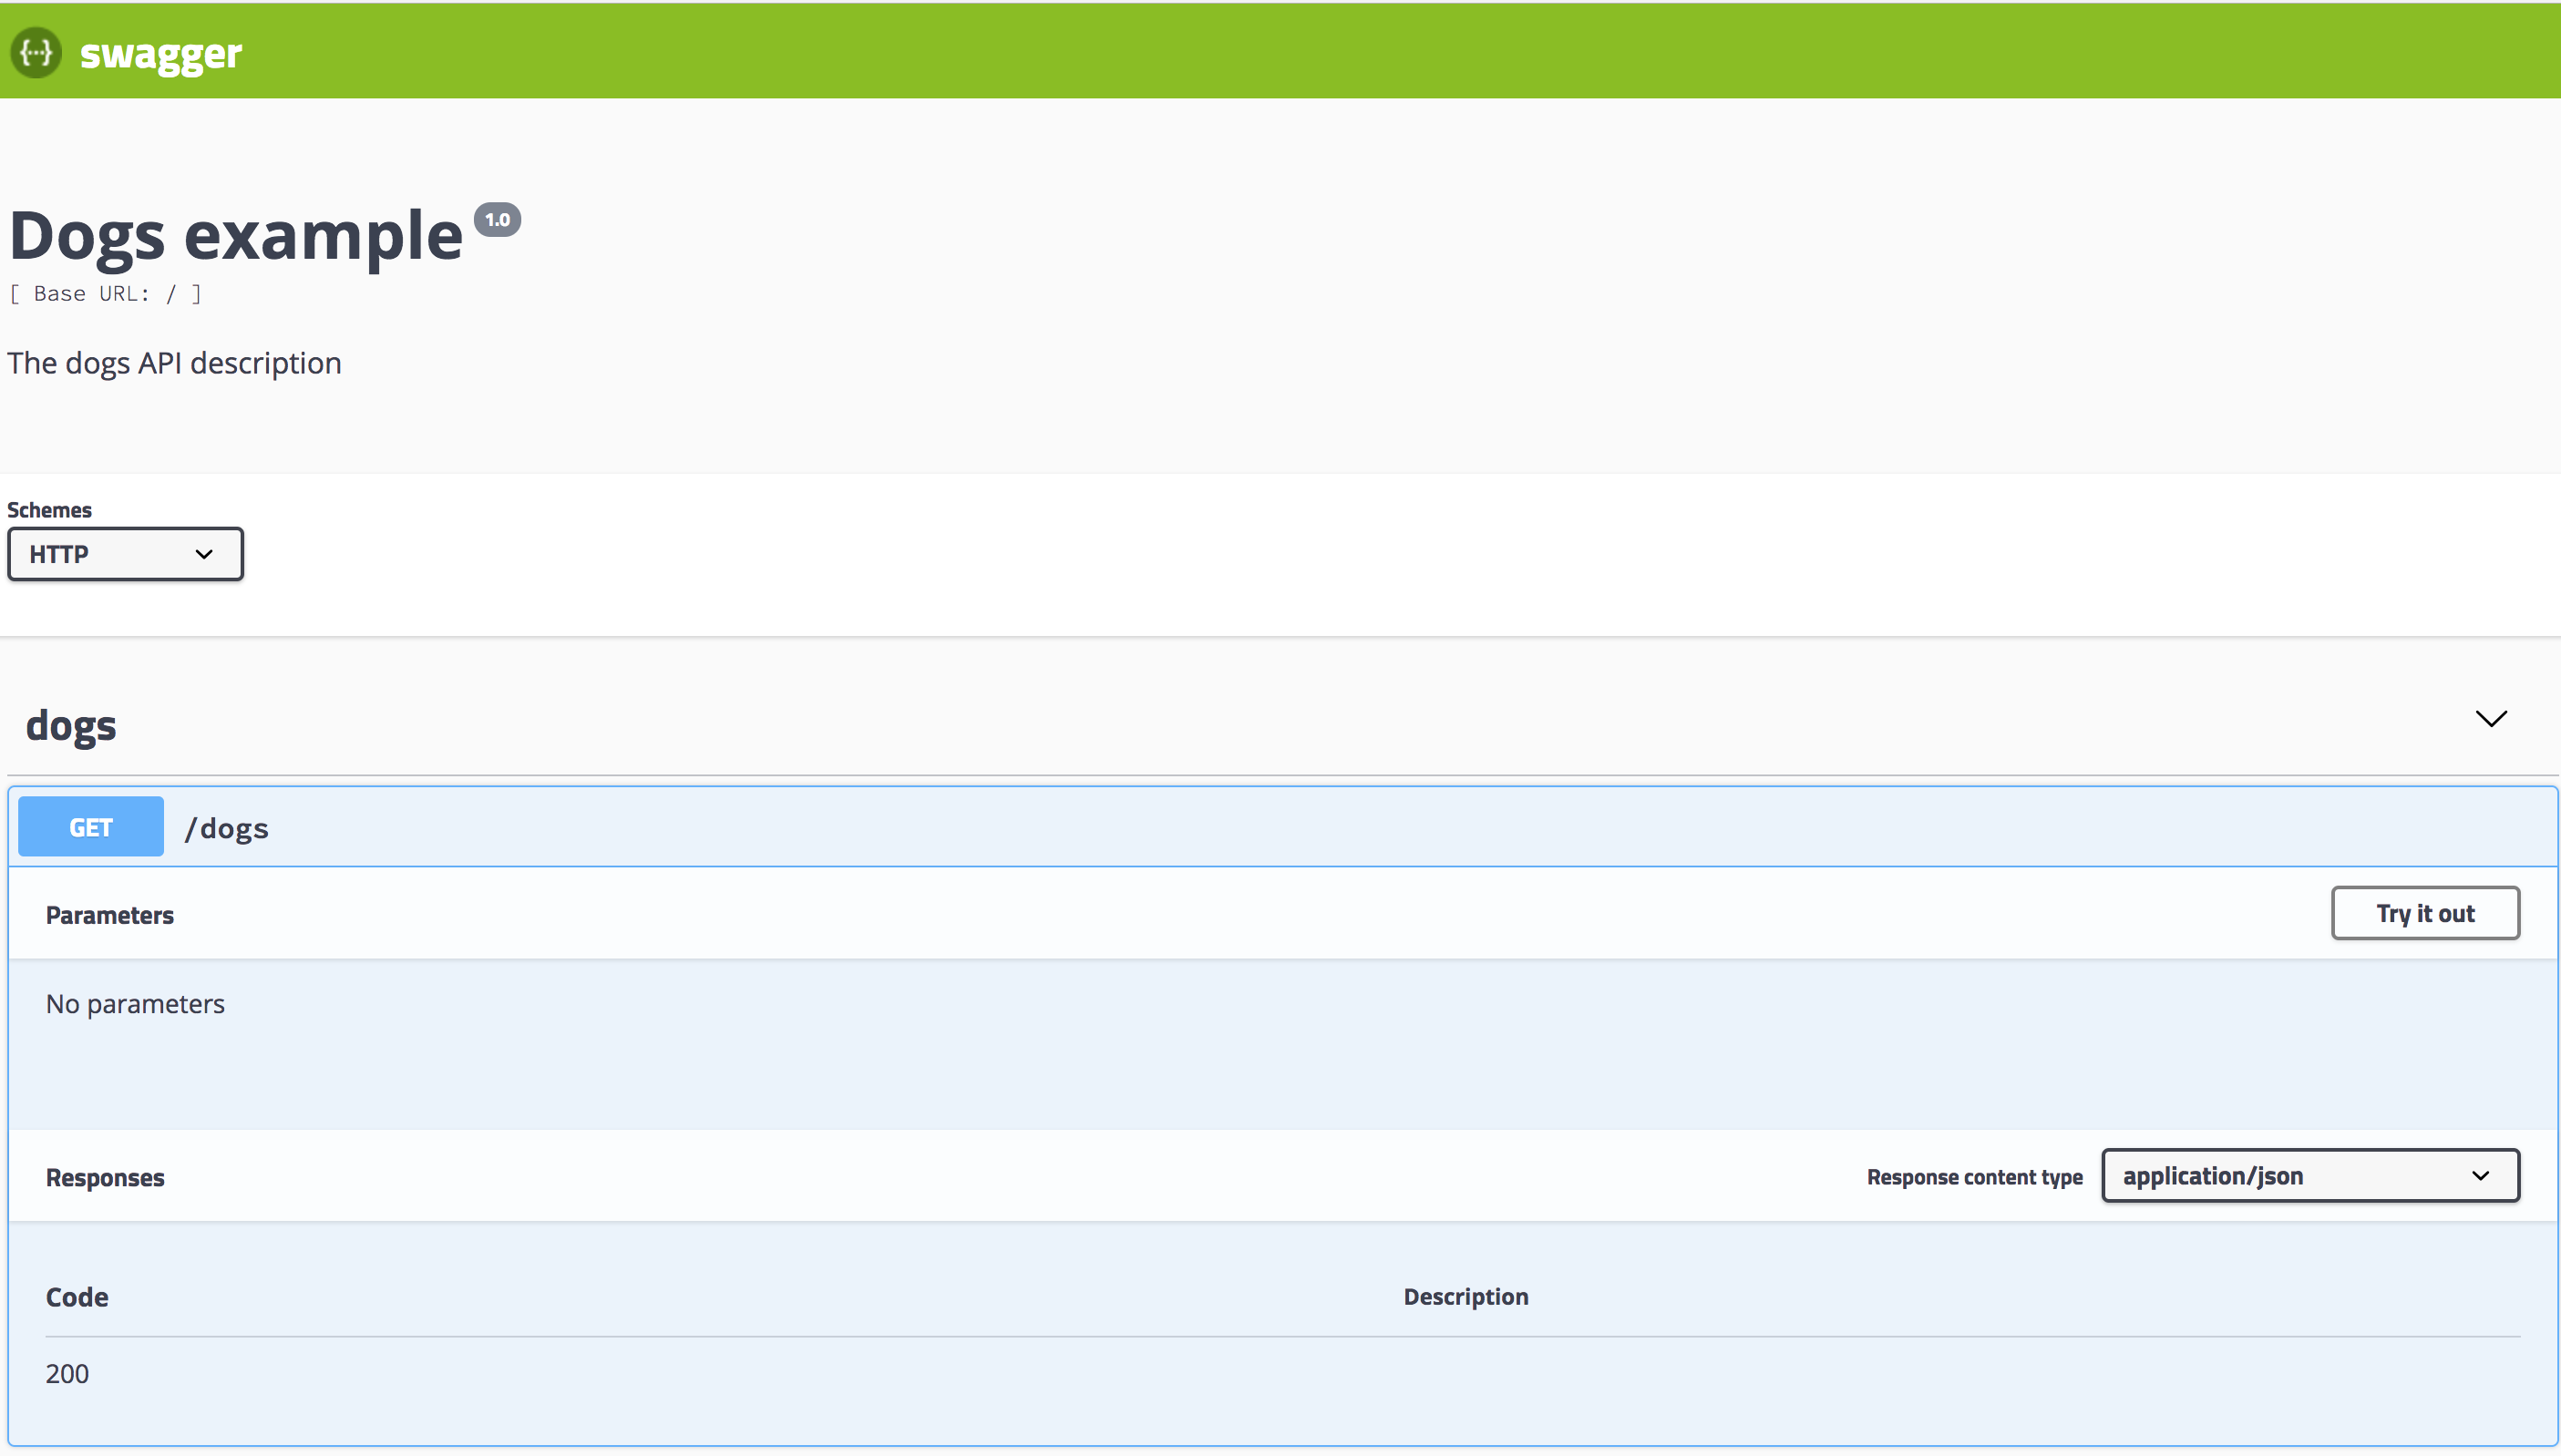
Tương tự, http://localhost:3000/api/dogs sẽ hiển thị Swagger UI cho dogs:
Dropdown in the explorer bar (dropdown trong explorer bar)
Để bật hỗ trợ nhiều spec trong dropdown menu của explorer bar, bạn cần đặt explorer: true và cấu hình swaggerOptions.urls trong SwaggerCustomOptions.
Gợi ý Đảm bảo rằng swaggerOptions.urls chỉ đến định dạng JSON của Swagger document. Để chỉ định JSON document, dùng jsonDocumentUrl trong SwaggerCustomOptions. Xem thêm các option thiết lập ở đây.
Đây là cách thiết lập nhiều spec từ dropdown trong explorer bar:
import { NestFactory } from '@nestjs/core';
import { SwaggerModule, DocumentBuilder } from '@nestjs/swagger';
import { AppModule } from './app.module.js';
import { CatsModule } from './cats/cats.module.js';
import { DogsModule } from './dogs/dogs.module.js';

async function bootstrap() {
  const app = await NestFactory.create(AppModule);

  // Main API options
  const options = new DocumentBuilder()
    .setTitle('Multiple Specifications Example')
    .setDescription('Description for multiple specifications')
    .setVersion('1.0')
    .build();

  // Create main API document
  const document = SwaggerModule.createDocument(app, options);

  // Setup main API Swagger UI with dropdown support
  SwaggerModule.setup('api', app, document, {
    explorer: true,
    swaggerOptions: {
      urls: [
        {
          name: '1. API',
          url: 'api/swagger.json',
        },
        {
          name: '2. Cats API',
          url: 'api/cats/swagger.json',
        },
        {
          name: '3. Dogs API',
          url: 'api/dogs/swagger.json',
        },
      ],
    },
    jsonDocumentUrl: '/api/swagger.json',
  });

  // Cats API options
  const catOptions = new DocumentBuilder()
    .setTitle('Cats Example')
    .setDescription('Description for the Cats API')
    .setVersion('1.0')
    .addTag('cats')
    .build();

  // Create Cats API document
  const catDocument = SwaggerModule.createDocument(app, catOptions, {
    include: [CatsModule],
  });

  // Setup Cats API Swagger UI
  SwaggerModule.setup('api/cats', app, catDocument, {
    jsonDocumentUrl: '/api/cats/swagger.json',
  });

  // Dogs API options
  const dogOptions = new DocumentBuilder()
    .setTitle('Dogs Example')
    .setDescription('Description for the Dogs API')
    .setVersion('1.0')
    .addTag('dogs')
    .build();

  // Create Dogs API document
  const dogDocument = SwaggerModule.createDocument(app, dogOptions, {
    include: [DogsModule],
  });

  // Setup Dogs API Swagger UI
  SwaggerModule.setup('api/dogs', app, dogDocument, {
    jsonDocumentUrl: '/api/dogs/swagger.json',
  });

  await app.listen(3000);
}

await bootstrap();
Trong ví dụ này, ta thiết lập một API chính cùng với các spec riêng biệt cho Cats và Dogs, mỗi spec có thể truy cập được từ dropdown trong explorer bar.