REPL là một môi trường tương tác đơn giản, nhận từng input của người dùng, thực thi nó và trả kết quả về cho người dùng. Tính năng REPL cho phép bạn kiểm tra dependency graph và gọi method trên các provider (và controller) của mình trực tiếp từ terminal.
Sử dụng
Để chạy ứng dụng NestJS ở chế độ REPL, tạo một file repl.ts mới (đặt cạnh file main.ts hiện có) và thêm đoạn code sau vào bên trong:
import { repl } from '@nestjs/core';
import { AppModule } from './app.module.js';

async function bootstrap() {
  await repl(AppModule);
}
await bootstrap();
import { repl } from '@nestjs/core';
import { AppModule } from './app.module.js';
async function bootstrap() {
await repl(AppModule);
}
await bootstrap();Bây giờ trong terminal, khởi động REPL bằng lệnh sau:
$ npm run start -- --entryFile replGợi ý repl trả về một đối tượng Node.js REPL server.
Khi nó chạy lên, bạn sẽ thấy thông báo sau trong console:
LOG [NestFactory] Starting Nest application...
LOG [InstanceLoader] AppModule dependencies initialized
LOG REPL initialized
Và giờ bạn có thể bắt đầu tương tác với dependency graph của mình. Ví dụ, bạn có thể lấy ra một AppService (ở đây chúng ta dùng starter project làm ví dụ) và gọi method getHello():
> get(AppService).getHello()
'Hello World!'
Bạn có thể thực thi bất kỳ đoạn JavaScript nào ngay trong terminal, ví dụ: gán một instance của AppController cho một biến local, và dùng await để gọi một method bất đồng bộ:
> appController = get(AppController)
AppController { appService: AppService {} }
> await appController.getHello()
'Hello World!'
Để hiển thị tất cả các method public có sẵn trên một provider hoặc controller nào đó, dùng hàm methods(), như sau:
> methods(AppController)

Methods:
 ◻ getHello
Để in ra danh sách tất cả các module đã đăng ký cùng với controller và provider của chúng, dùng debug().
> debug()

AppModule:
 - controllers:
  ◻ AppController
 - providers:
  ◻ AppService
Demo nhanh:
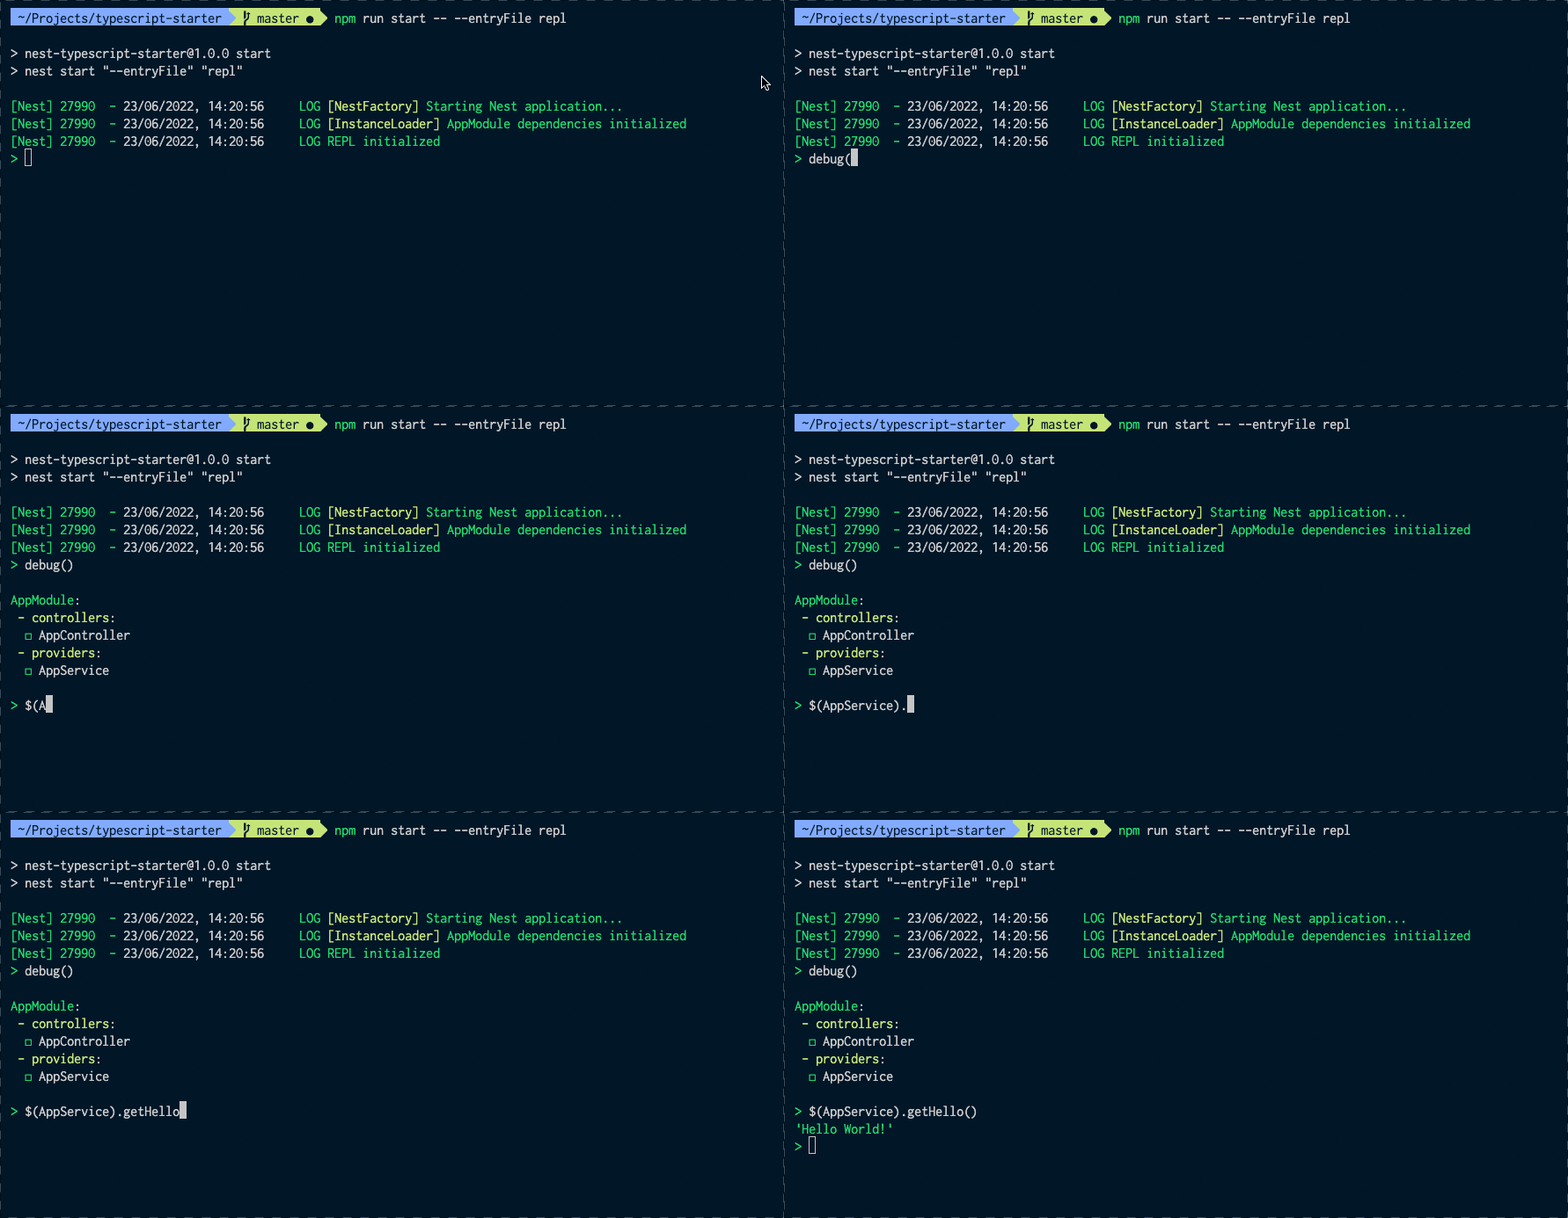
Bạn có thể tìm thêm thông tin về các method có sẵn (predefined native method) trong phần bên dưới.
Các hàm có sẵn (Native functions)
REPL tích hợp sẵn của NestJS đi kèm một vài hàm có sẵn (native function) được cung cấp toàn cục khi bạn khởi động REPL. Bạn có thể gọi help() để liệt kê chúng.
Nếu bạn không nhớ signature (tức tham số kỳ vọng và kiểu trả về) của một hàm, bạn có thể gọi <tên_hàm>.help.
Ví dụ:
> $.help
Retrieves an instance of either injectable or controller, otherwise, throws exception.
Interface: $(token: InjectionToken) => any
Gợi ý Các interface hàm này được viết theo cú pháp function type expression của TypeScript.
| Hàm | Mô tả | Signature |
|---|---|---|
debug |
In ra danh sách tất cả các module đã đăng ký cùng với controller và provider của chúng. | debug(moduleCls?: ClassRef | string) => void |
get hoặc $ |
Lấy ra một instance của injectable hoặc controller, nếu không có sẽ ném exception. | get(token: InjectionToken) => any |
methods |
Hiển thị tất cả các method public có sẵn trên một provider hoặc controller. | methods(token: ClassRef | string) => void |
resolve |
Resolve instance có scope transient hoặc request của injectable hoặc controller, nếu không có sẽ ném exception. | resolve(token: InjectionToken, contextId: any) => Promise<any> |
select |
Cho phép điều hướng qua cây module (modules tree), ví dụ để lấy ra một instance cụ thể từ module đã chọn. | select(token: DynamicModule | ClassRef) => INestApplicationContext |
Watch mode
Trong quá trình phát triển, sẽ rất hữu ích nếu chạy REPL ở watch mode để tự động phản ánh mọi thay đổi code:
$ npm run start -- --watch --entryFile replCách này có một nhược điểm: lịch sử lệnh (command history) của REPL bị xóa sau mỗi lần reload, điều này có thể gây bất tiện.
May mắn là có một giải pháp rất đơn giản. Sửa lại hàm bootstrap của bạn như sau:
async function bootstrap() {
  const replServer = await repl(AppModule);
  replServer.setupHistory(".nestjs_repl_history", (err) => {
    if (err) {
      console.error(err);
    }
  });
}
Giờ đây lịch sử lệnh sẽ được giữ lại giữa các lần chạy/reload.
Ghi chú người dịch REPL ở đây tương tự php artisan tinker trong Laravel hay rails console trong Rails — một cách nhanh để “chọc” thẳng vào IoC container mà không cần bật cả HTTP server, rất tiện để debug hoặc thử nghiệm logic trong provider mà không phải viết test hay gọi API thật.